When you receive a new form submission, 99Inbound can:
- Create a new lead (with the lead status of your choosing).
- Automatically add a note to your new lead with all the submission values.
- Map form fields to lead and address fields.
Here’s how to get started:
Connect Zendesk Sell to 99Inbound
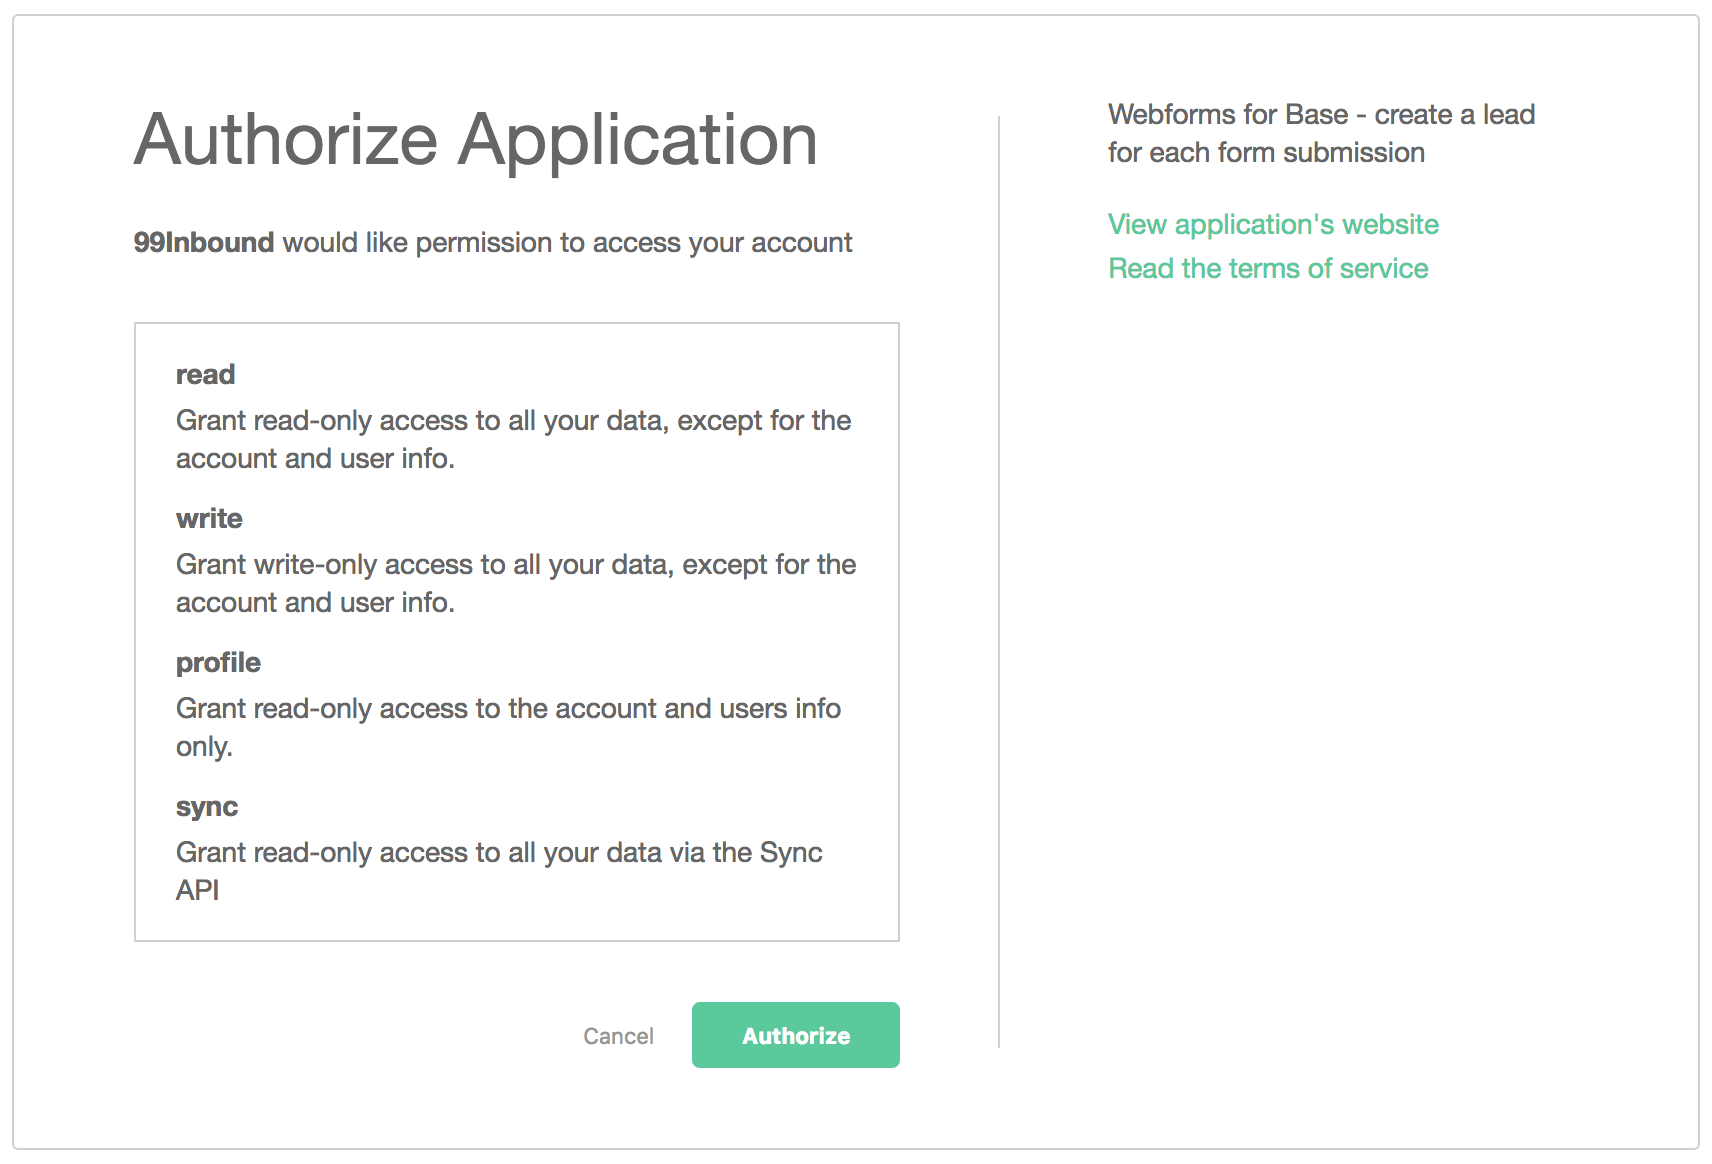
In the 99Inbound console, navigate to Integrations in the sidebar and click ‘Connect’ next to the Zendesk Sell logo. You’ll be taken to the Zendesk Sell Authorization screen where you’ll be asked to provide 99Inbound with permission to connect to your account
Connect Zendesk Sell to your form
Learn how to build a form, or connect an existing form to our API
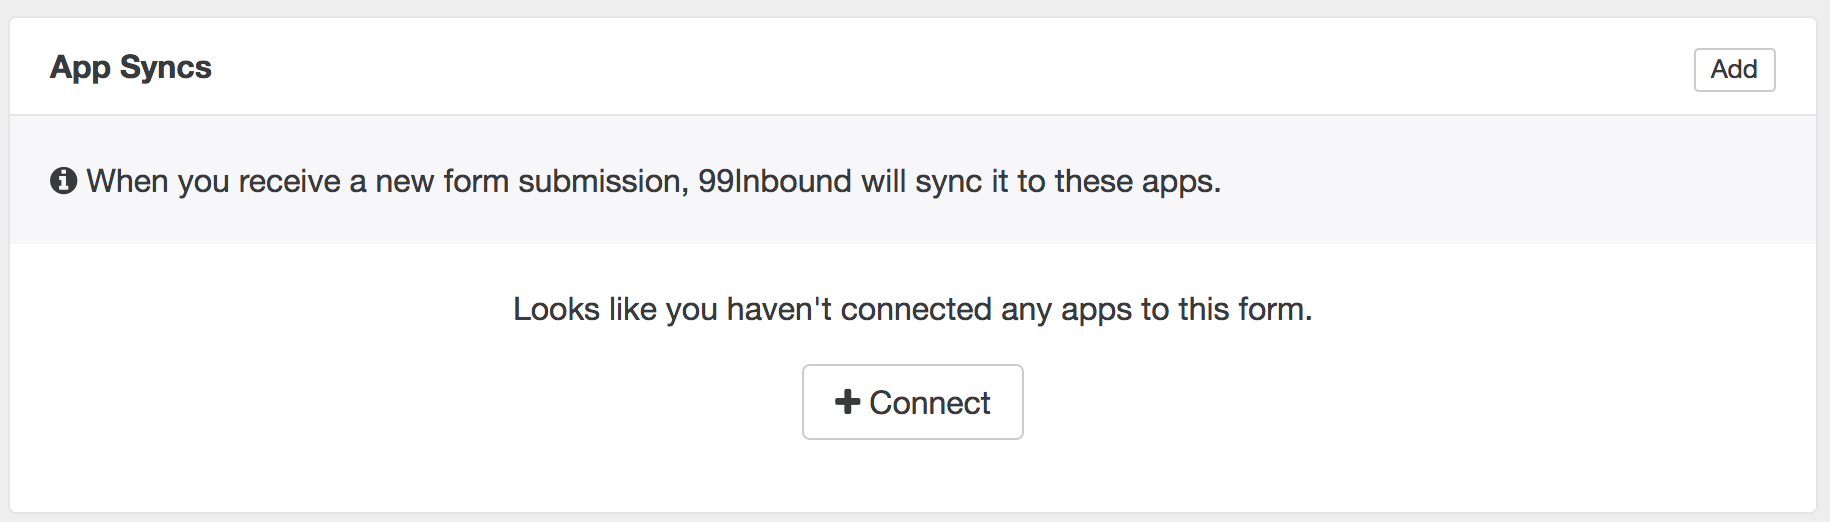
Navigate to your form, scroll to ‘app sync’, and click connect to add your Zendesk Sell account to the form.
At this point the Zendesk Sell integration will be working, and you can test submitting a few new form entries.
Configure Zendesk Sell sync settings
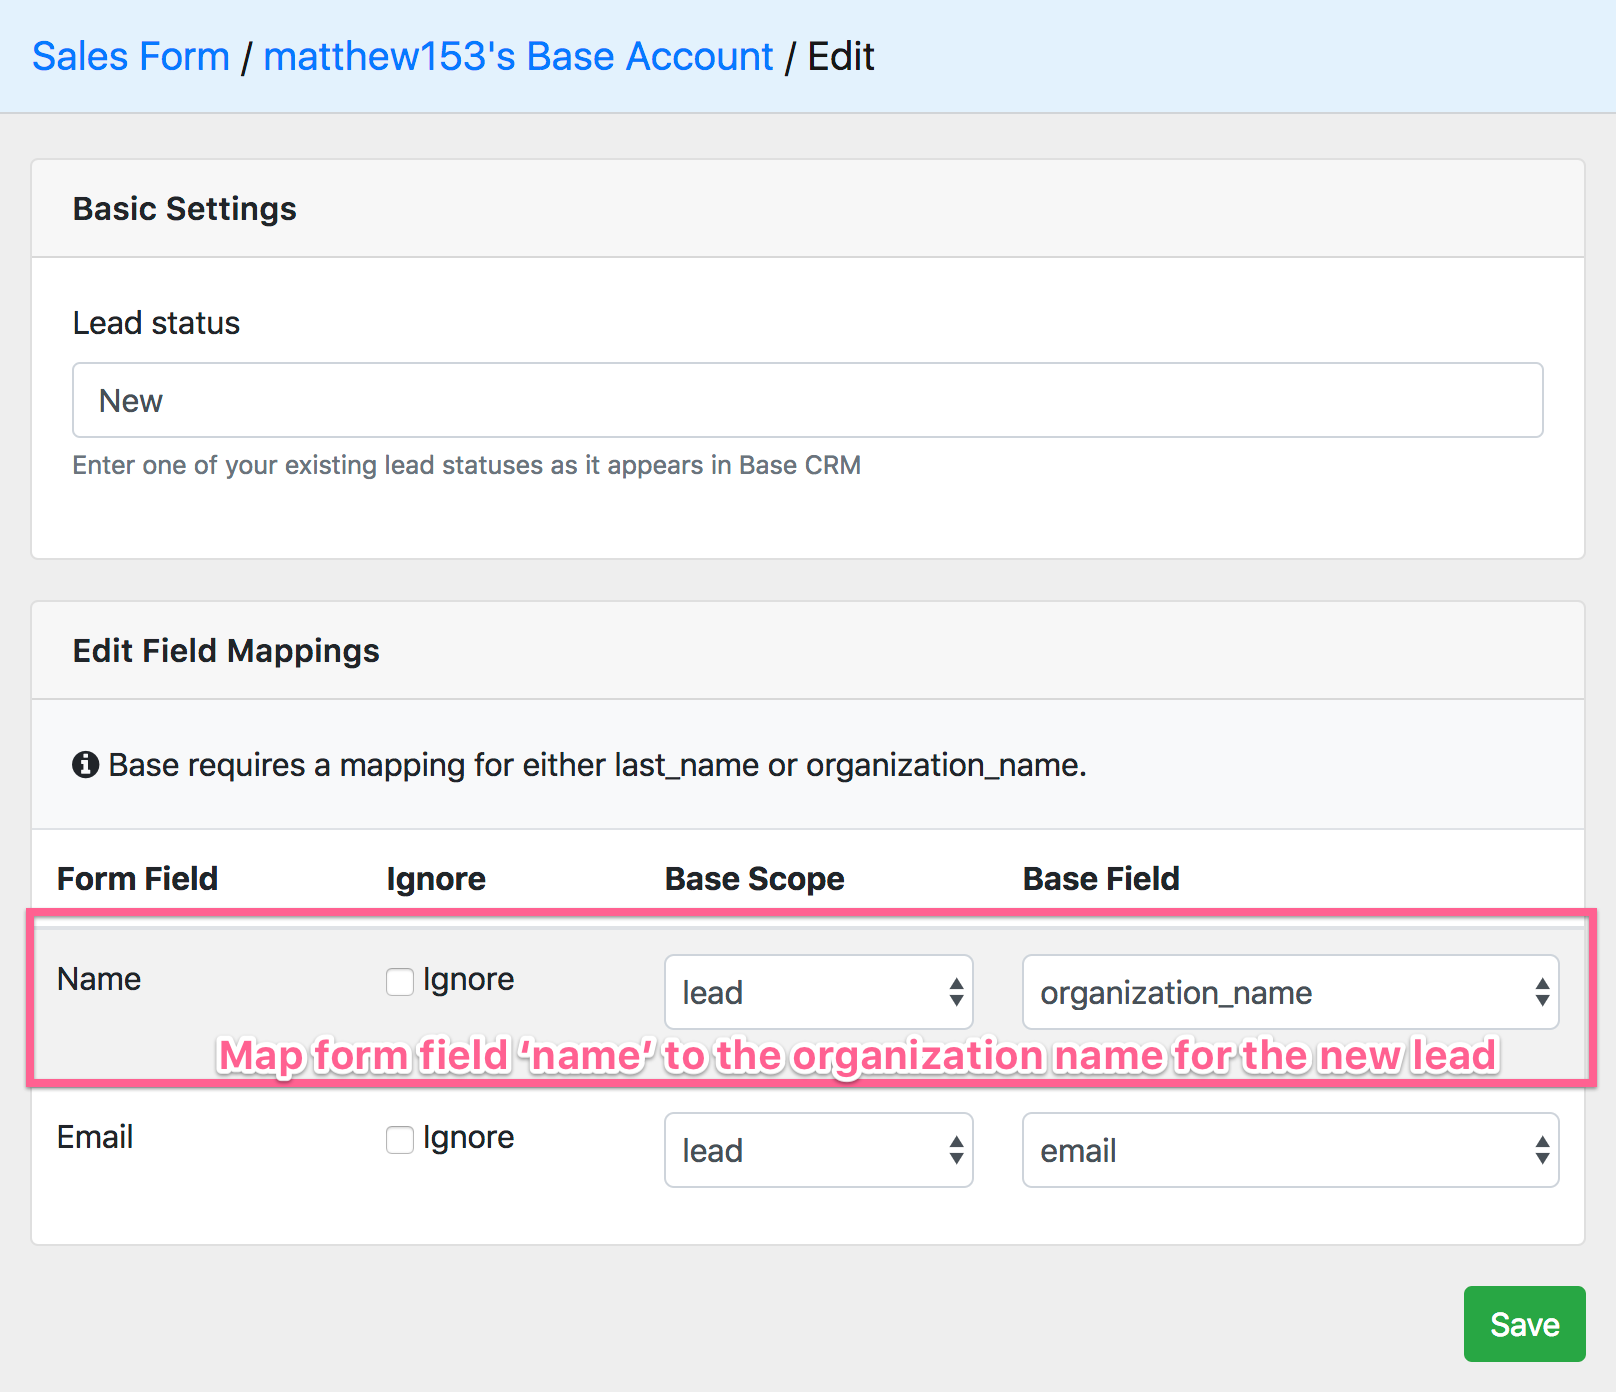
By default all new form entries will sync to a mostly empty lead in Zendesk Sell. You can map your form fields to Zendesk Sell fields on the configuration screen.
Receive leads
Once you’ve saved your configuration its time to test your form! Submit a new entry to your form and watch the new lead appear in Zendesk Sell.
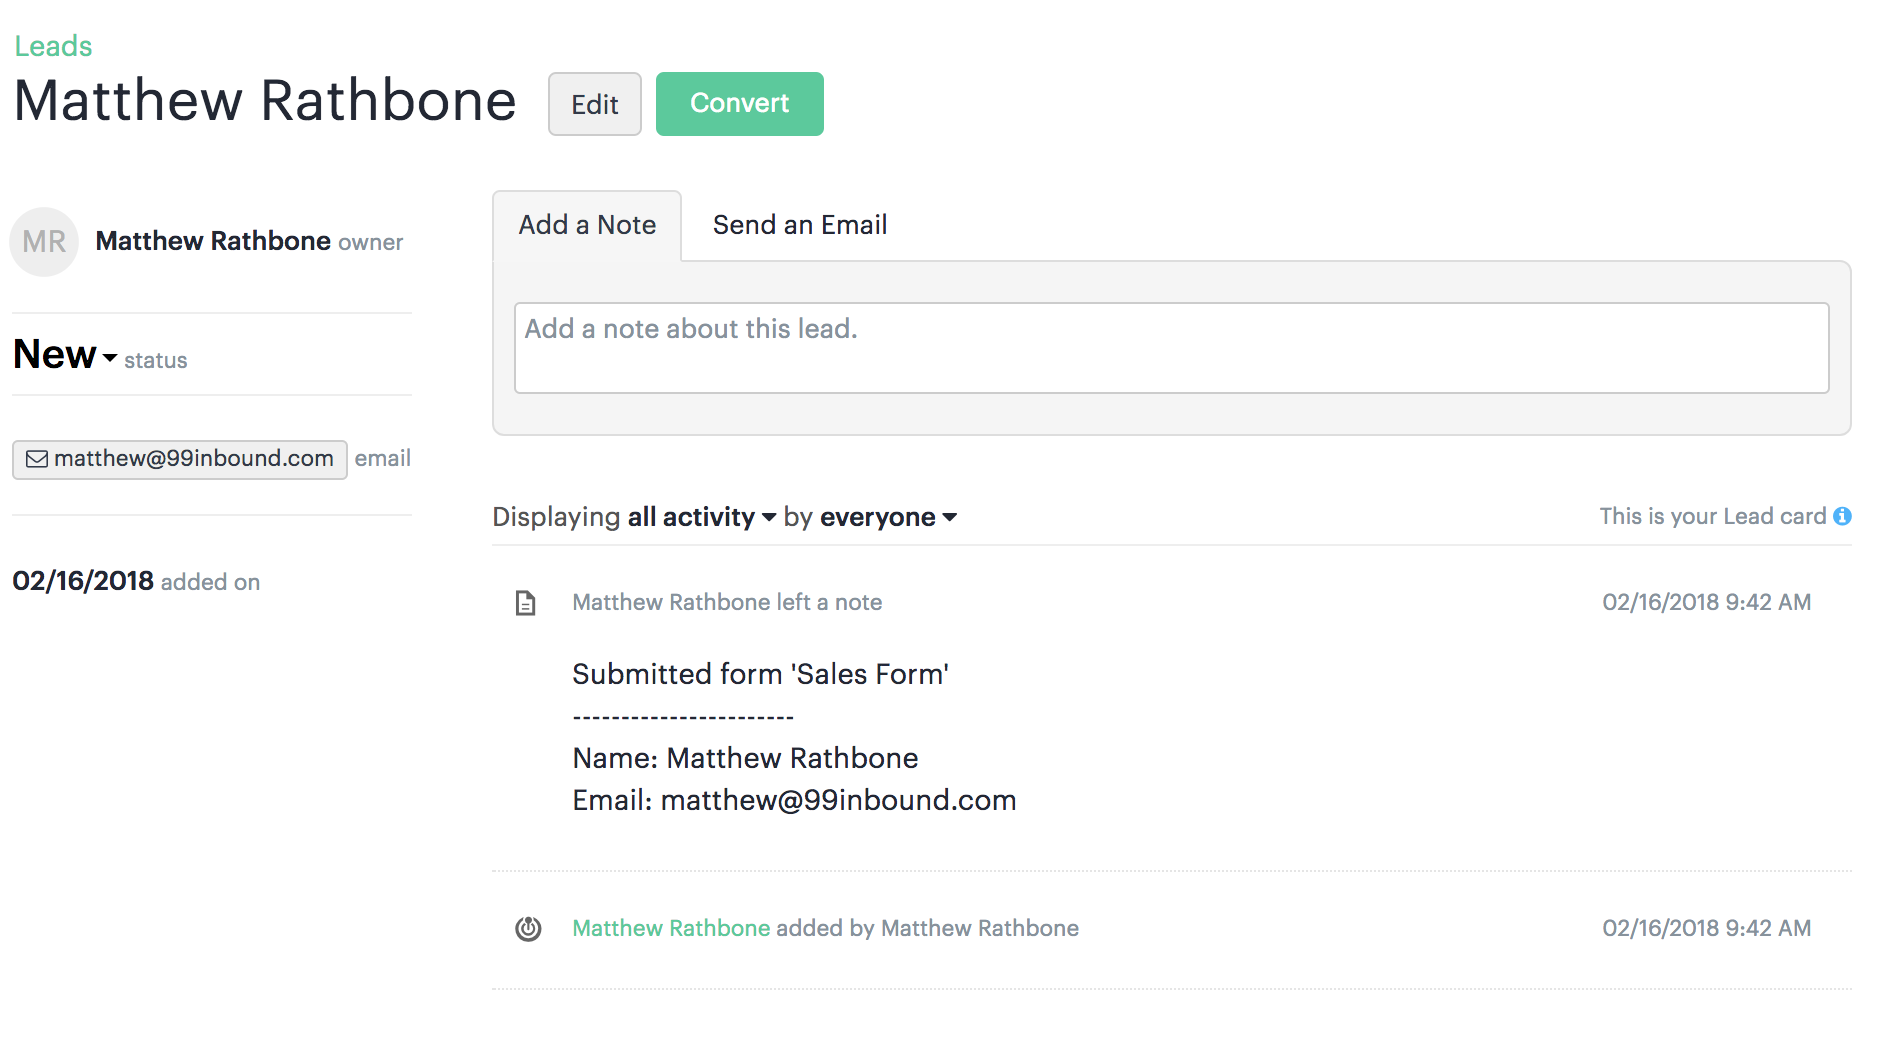
Each lead created by 99Inbound will also include a note with all the form values. So if you haven’t mapped every form field to a lead field you’ll still see everything here.
Next Steps
We recommend setting up a notification, to alert your sales staff in real time that they have received a new lead.