Connect Mailchimp to 99Inbound
Before you can configure form syncing to Mailchimp you must connect your Mailchimp account to 99Inbound.
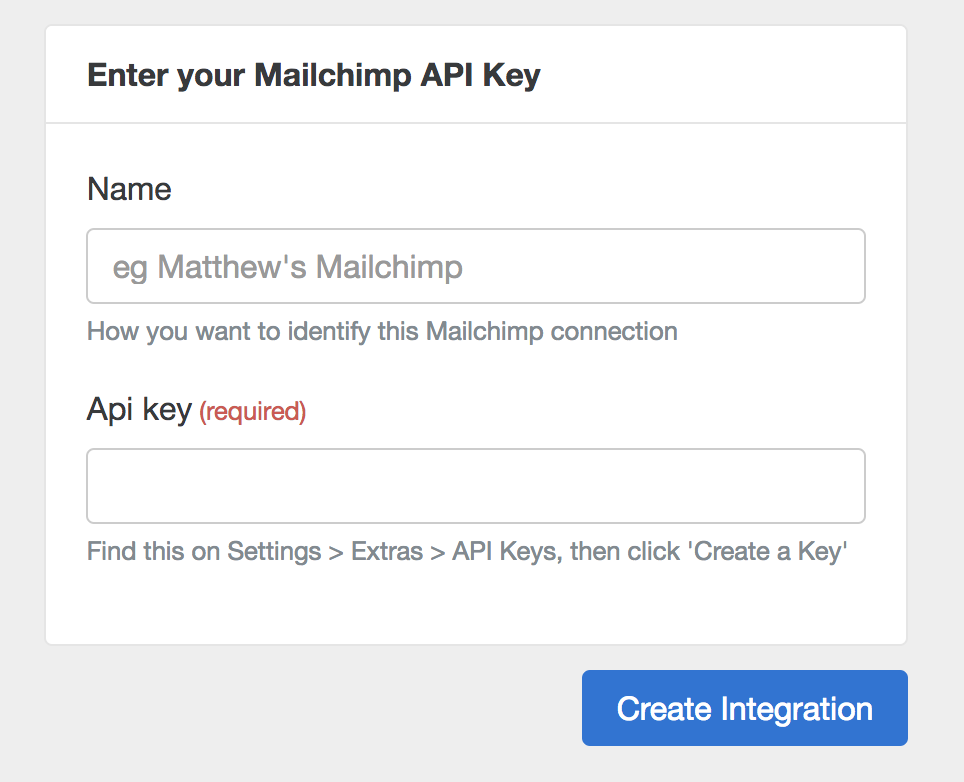
Navigate to Integrations in the sidebar and click connect next to the Mailchimp logo. You’ll be prompted for an API key.

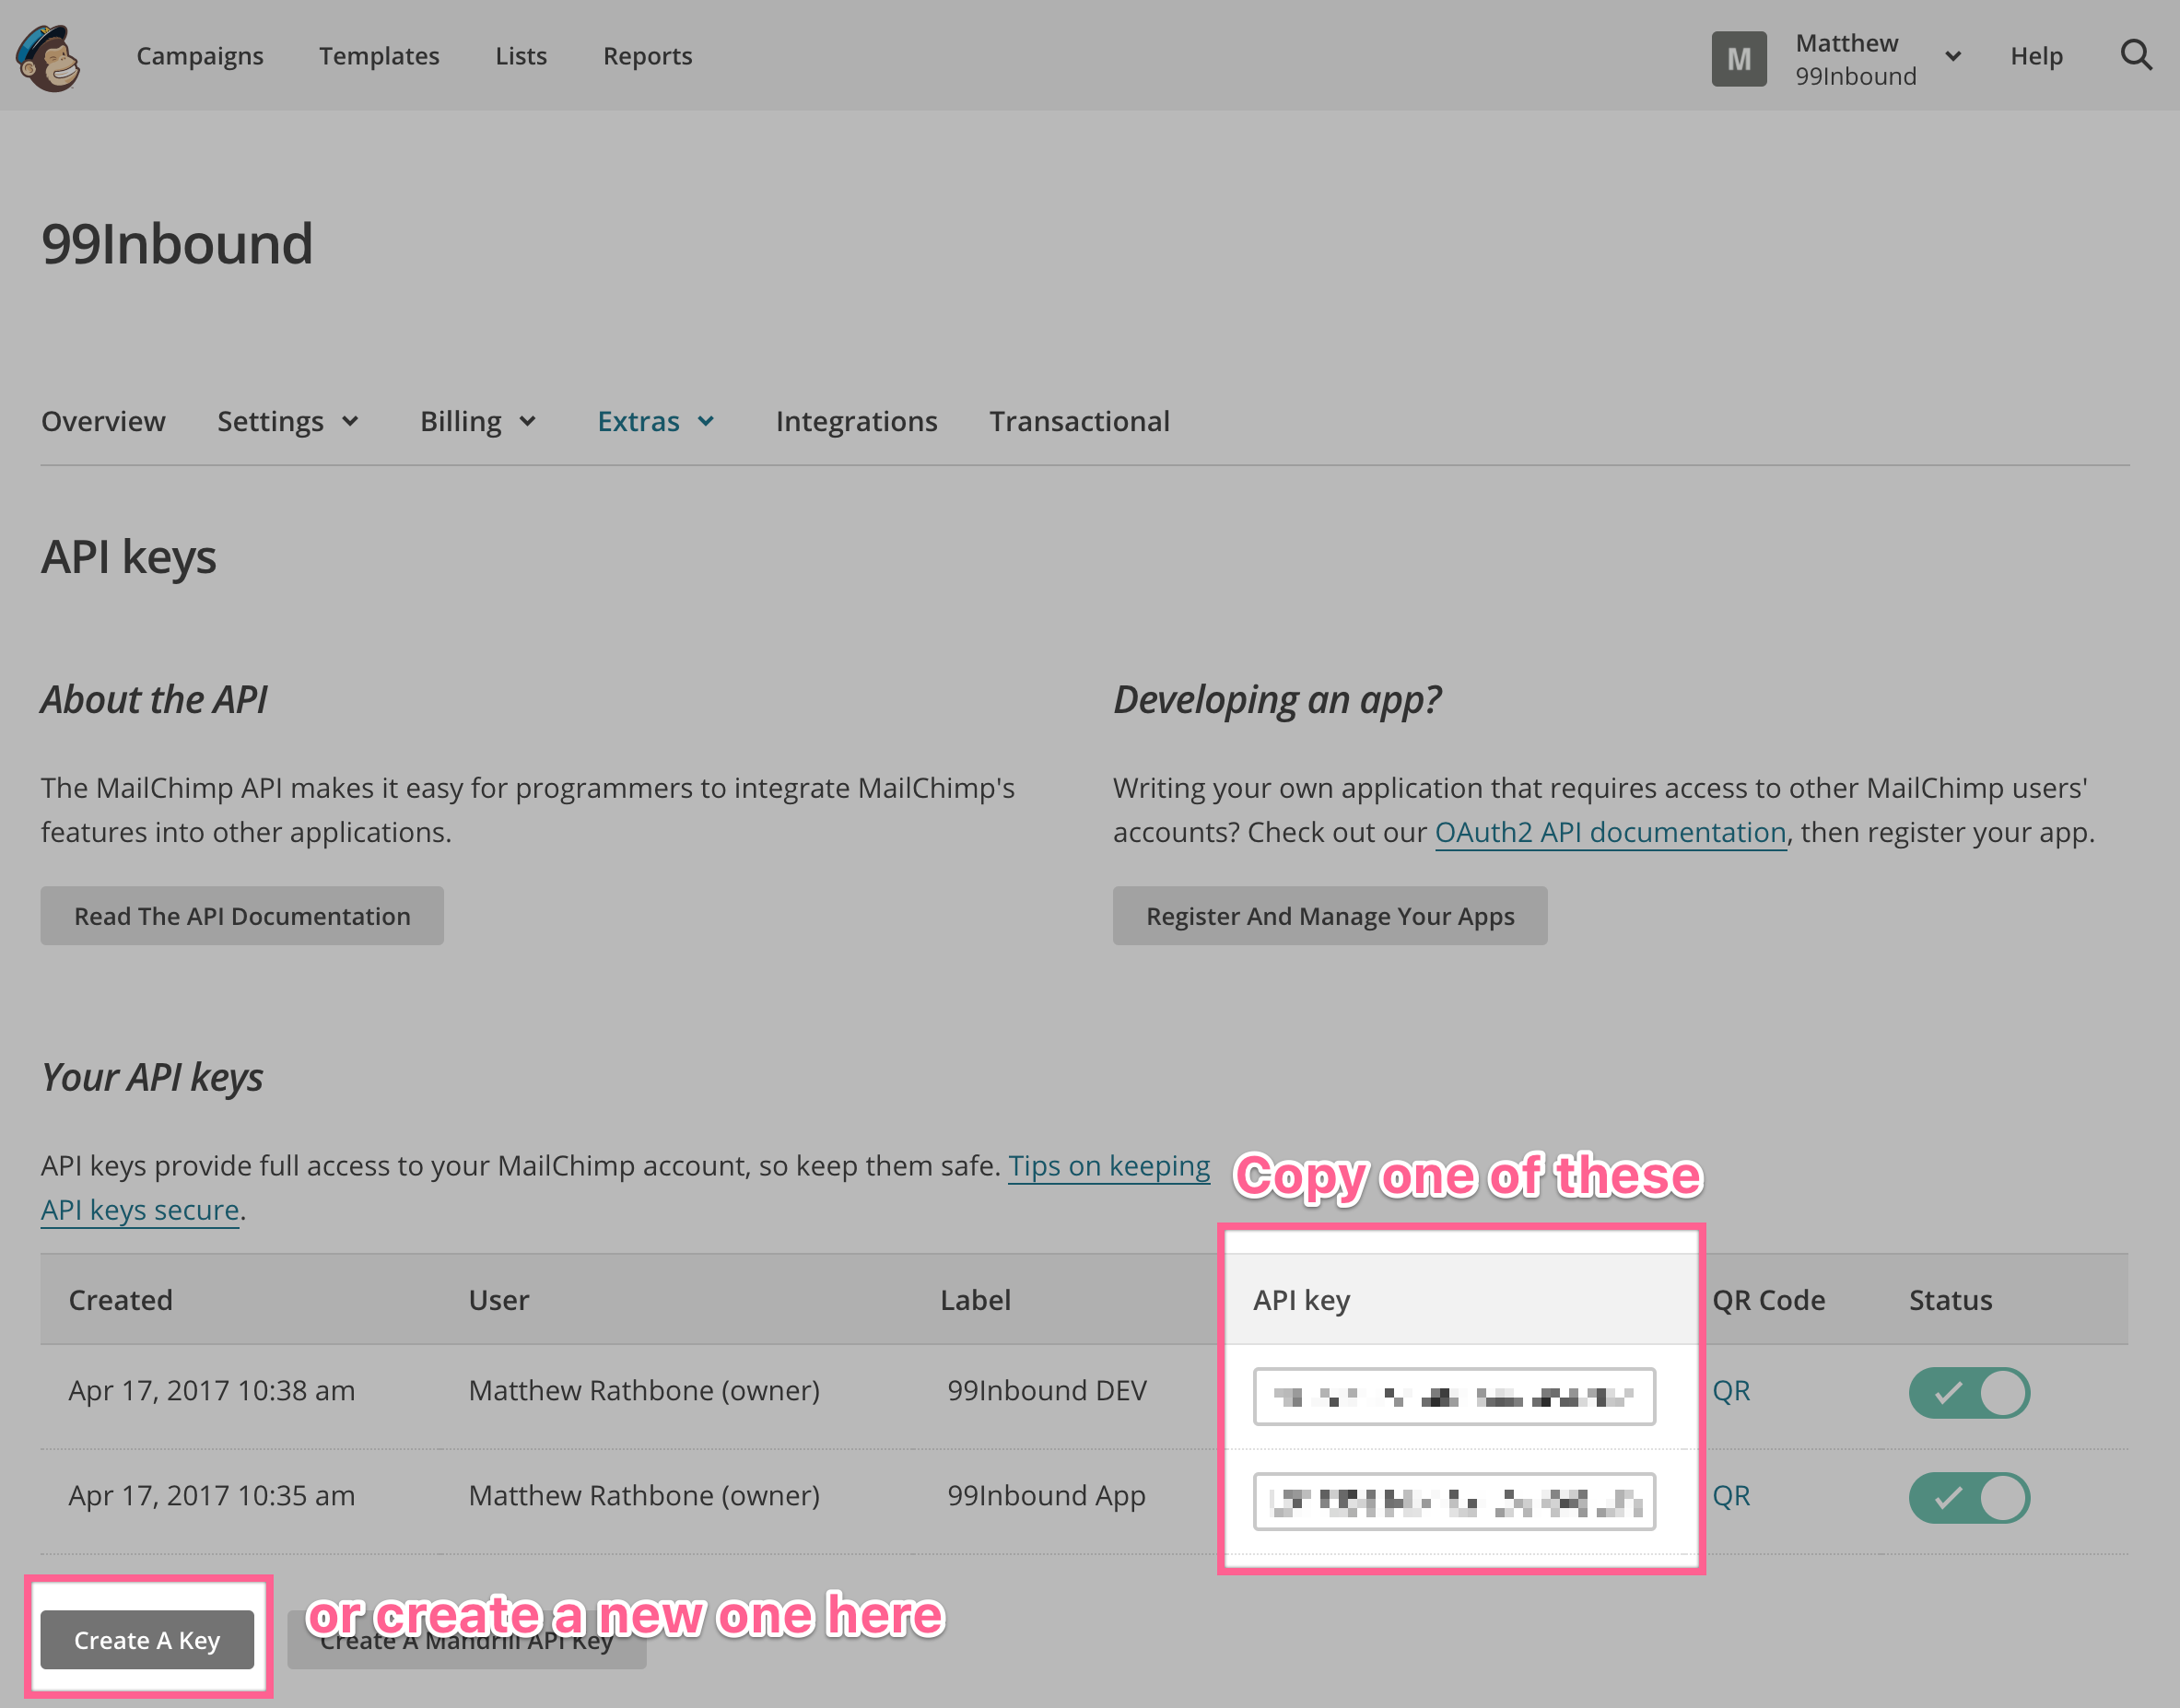
You can find this on your Mailchimp settings page under Account / Extras / API Keys

Once you have entered the API key into 99Inbound you are ready to connect it to your forms.
Connect your form to Mailchimp
Learn how to build a form, or connect an existing form to our API
Under ‘App Sync’, click connect and select ‘Mailchimp’. You’ll be taken to the configuration screen.
There are several parts to configure to sync new entries to Mailchimp.
- Which list to sync to
- How to map form fields to Mailchimp list fields
- What static values to set (if any)
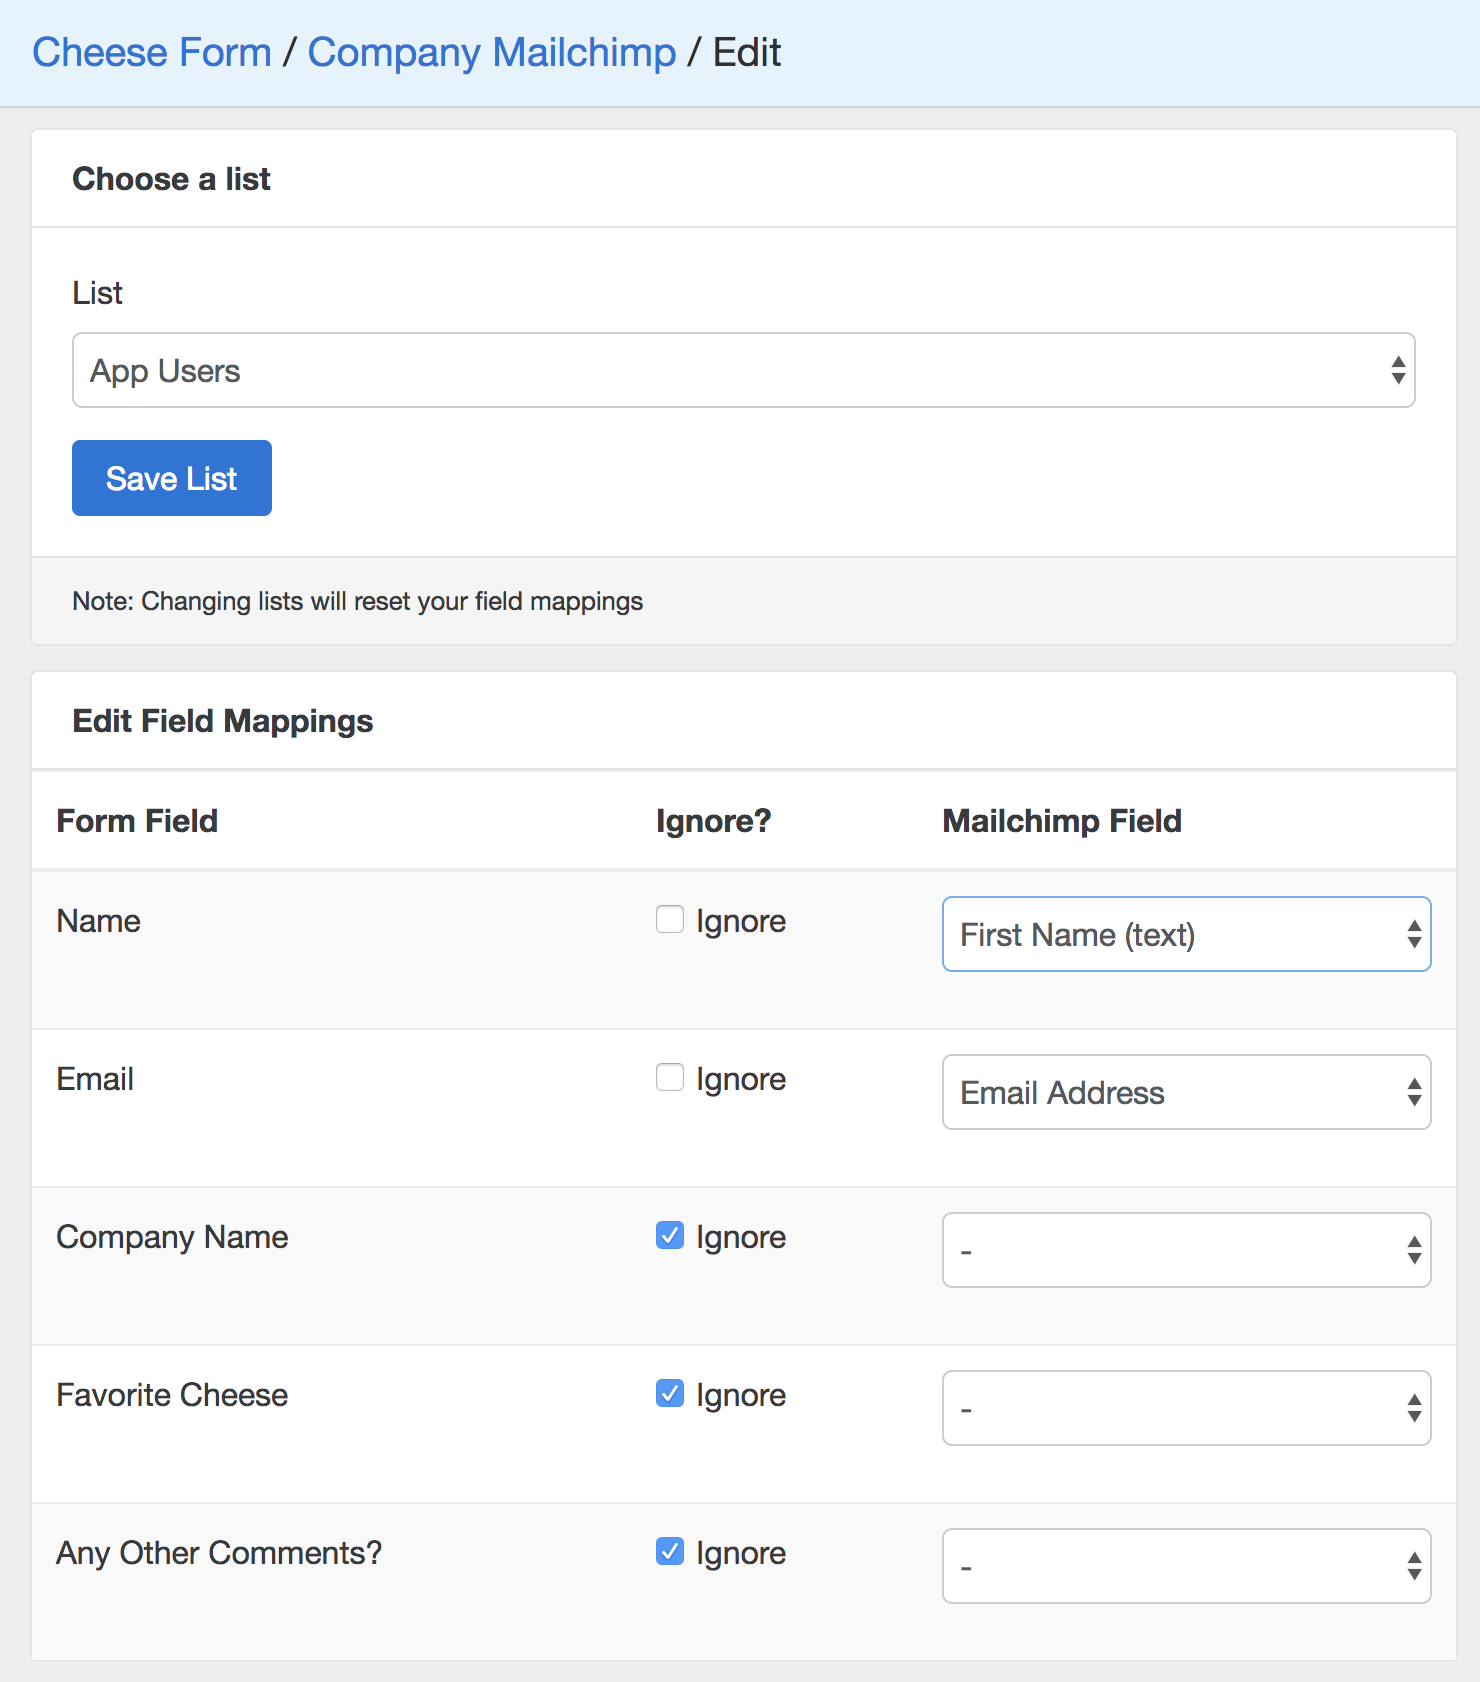
99Inbound will pre-populate the set of available lists directly from mailchimp, so simply pick a list to sync to.
Note Changing the list will reset your field mappings (each list has different fields)
List config and field mapping
This is the bulk of the configuration for mailchimp. You can map a form field to either built-in mailchimp fields (like email), or custom fields you have added to your list.
Important For the mailchimp sync to work you must at the very least create a mapping for the
email address.
Here’s an example of a completed configuration:

Set static values
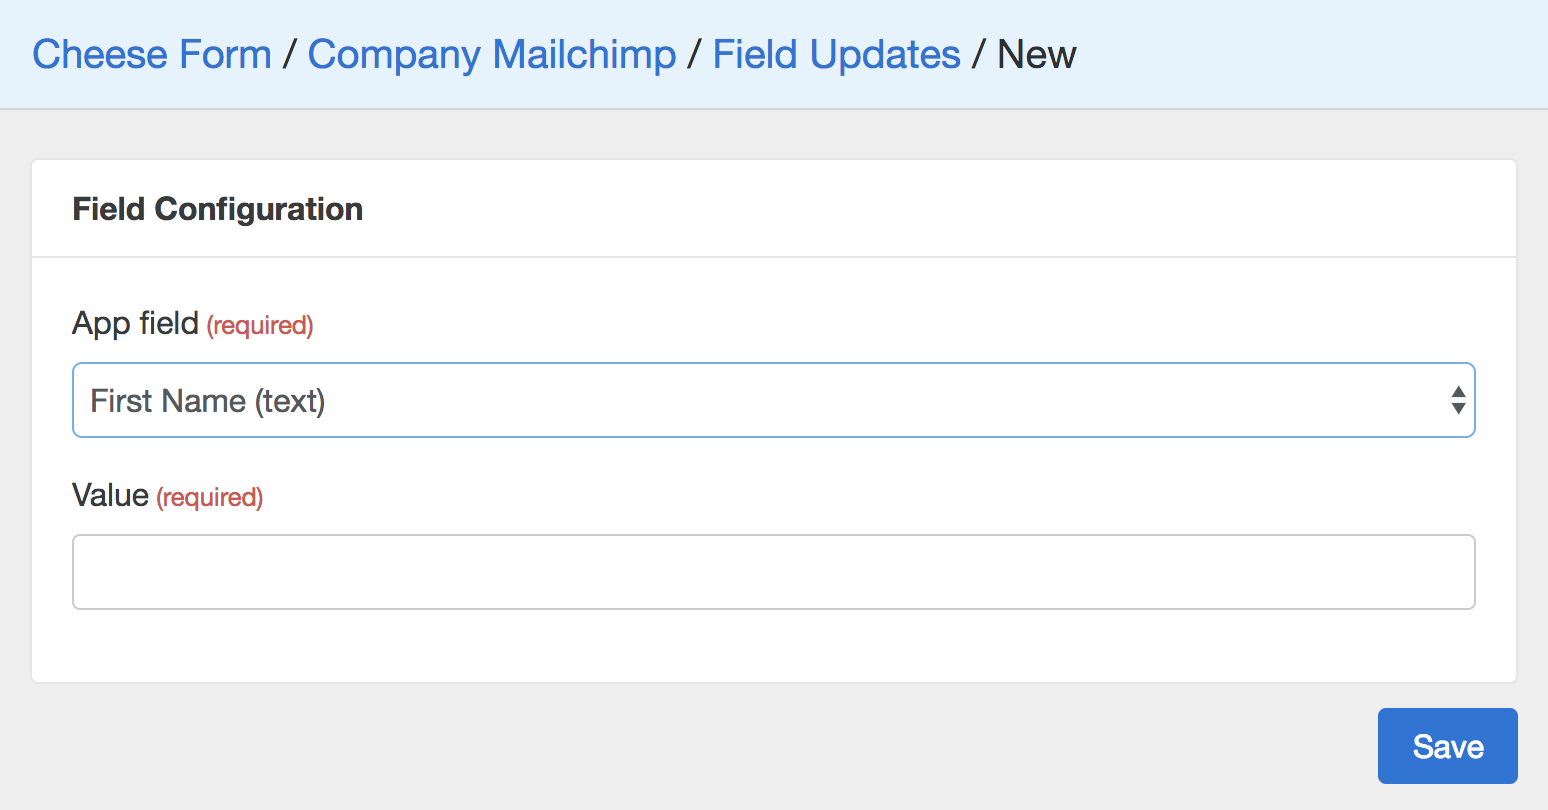
You can set static values that will be the same on every entry you sync to mailchimp. To configure this, click on Set some values on the new subscriber from the Mailchimp integration config screen, then enter the field and value you’d like to set.
Note - these values overwrite any form entry field mappings, so choose carefully!

Wrapping up
Once you save this configuration, your entries will start syncing to Mailchimp. If anything goes wrong synchronizing an entry we’ll send you an email letting you know.
You can view the status of individual app syncs on the form entries page for that form.